 SAIL MAKING - Building Board

by
Ben Morris
(last edited 08/06/2021)
Create a Building
Board
I have
eventually got around to making a new board which incorporates a few
improvements. Instead of using the NACA airfoil, I have used a section of
a parabola with a maximum depth at 43% of the chord. See the
spreadsheet for details. I made the chord 500
mm to enable most type of sails to be produced. In addition I also
included a pair of hinges made from 8 mm threaded rod which are placed about
half way down the curve area. It is also built on a substantial flat base
which is subsequently cut in two. The biggest advantage of this
arrangement is it reduces the actual opening distance and allows the seam to sit
more smoothly when joining it. The 43% position of maximum draft produces a sail
with slightly less acceleration but higher pointing ability due to a shallower
entrance angle. I have detailed the construction of the board on the
sail board
construction page. I should
mention one of the many sailors to comment on this page has suggested using
metal threads to control the height of lift of the board rather than the pieces
of ply I use. This certainly has some advantages of producing any value of
lift without hunting around for a piece of ply (or two or more on top of each
other) to get the correct lift. Another option suggested which might be
easier to construct is to a use graduated, tapered wedge on either side.
Sliding the wedge in to the required lift height would certainly save on having
all those pieces of ply of different thickness that seem to get lost.
Original board
I used
the modified NACA curve to produce a curved sail building board. Unlike
many of the suggestions for making such a board from solid timber, I used my
experience of creating airfoil sections in glider wings to produce a much
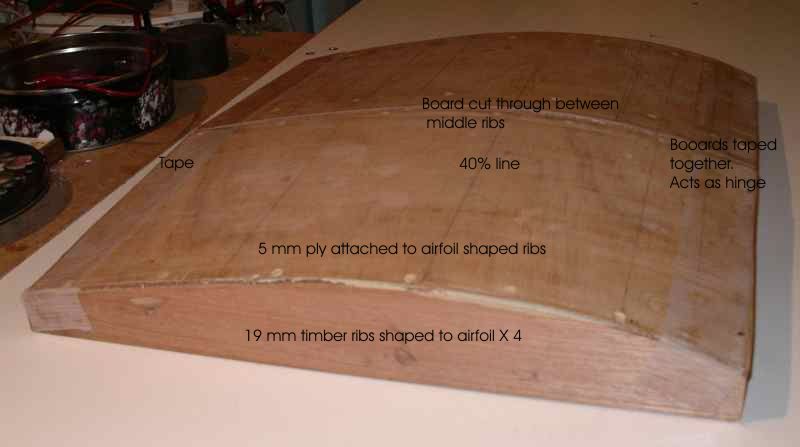
lighter and more easily produced board. I cut and shaped four ribs from 19
mm thick timber to match the NACA curve. I made these about 470 mm long ie
the modified NACA section is 470 mm chord . A piece of 4 mm ply approx 470 mm X 500
mm was then attached to the 4 ribs using small screws - one at each end and the
other two in the middle separated by about 20 mm. The main grain of the
ply was place across the ribs to allow it to bend more readily and conform to
the ribs. I then added strengthening timber battens across the ends of the
ply (ie at the leading and trailing edge of the airfoil to keep then straight.
This process produces a flat building board with no V-join in the middle.
This is achieved by carefully marking the centre of the board midway between the
two middle ribs and cutting the board in two. The two exposed ends are
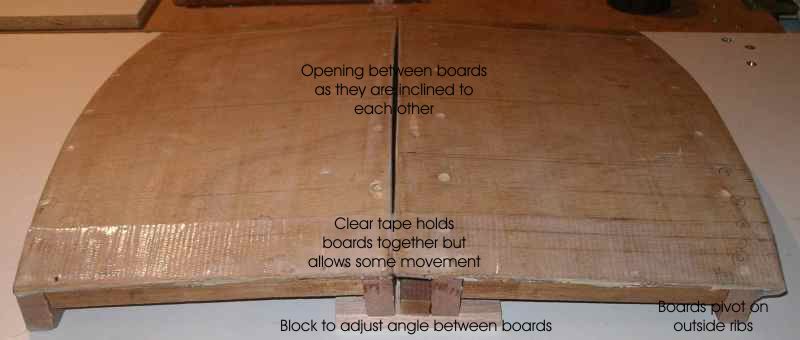
sanded smooth and rounded. The two sections are then taped together at the outer ends of
the join on the top surface. This allows the two halves of the board to be
tilted by placing temporary blocks under the two centre ribs to angle the two
halves of the board to each other.


This
arrangement has one big advantages with few disadvantages over a solid board.
The most obvious is that the angle between the two halves of the board can be
varied by simply placing thinner or thicker blocks under the two centre ribs.
This allows for a single board to replace the multiple boards suggested in other
sites.